What Is Scan to BIM and How Does It Work? A Complete Guide
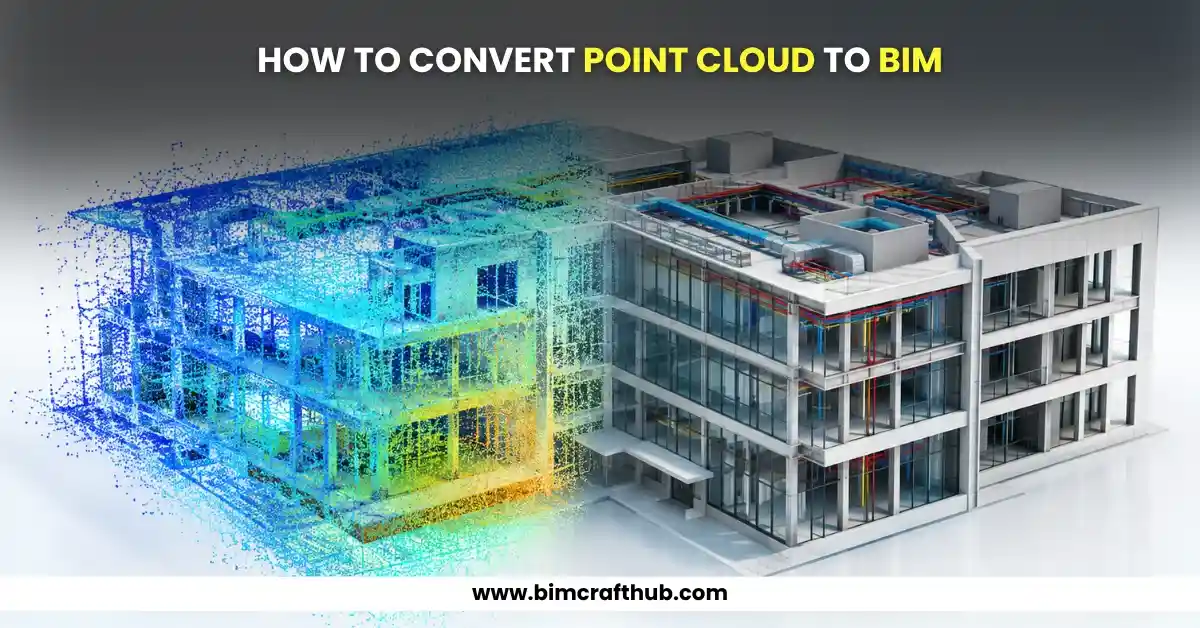
Converting a point cloud into a usable Building Information Model (BIM) is an important workflow for renovation, retrofit, as-built documentation, and facility management projects. Point cloud to BIM Conversion Services help AEC teams transform laser-scanned building data into accurate, structured BIM models that represent existing conditions. Unlike simply viewing a point cloud, the process requires interpreting millions of measured points and converting them into meaningful architectural, structural, and MEP elements.
But how exactly does point cloud data become a BIM model? The process involves several stages, from preparing the scan data to modeling, quality checking, and delivering the final BIM model.
What Is Point Cloud to BIM Conversion?
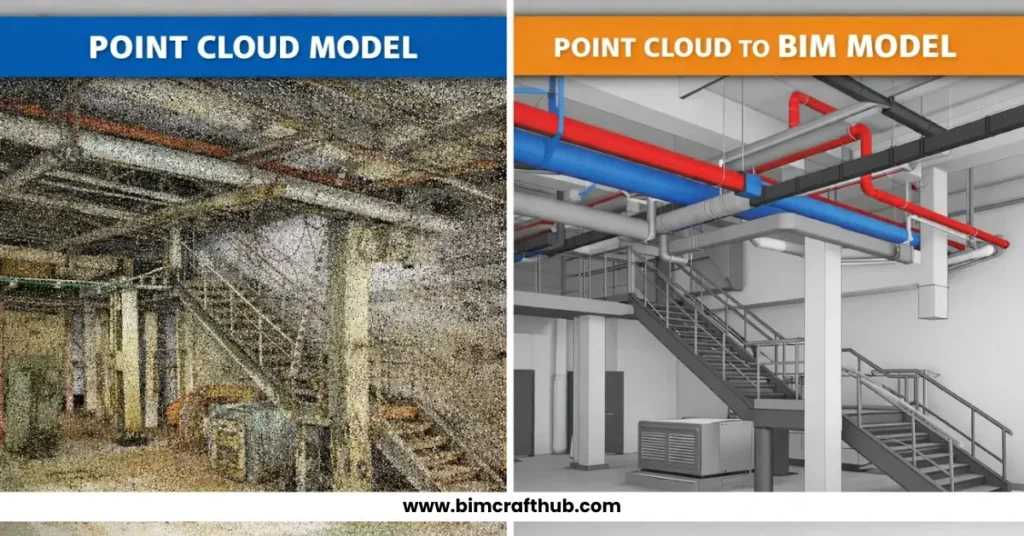
A point cloud is a collection of millions or even billions of points captured from an existing building using laser scanning or other reality-capture technologies. Each point contains spatial information, typically including X, Y, and Z coordinates.
A BIM model, on the other hand, contains intelligent building elements such as:
- Walls
- Floors
- Ceilings
- Doors and windows
- Columns and beams
- Roofs
- Stairs
- HVAC systems
- Plumbing
- Electrical components
Therefore, point cloud to BIM conversion is not simply changing one file format into another. It is a modeling process in which measured site data is interpreted and reconstructed as structured BIM elements.
Autodesk describes point clouds as a starting reference for creating Revit models of existing buildings and sites.
Point Cloud to BIM Conversion Process
A typical workflow can be divided into seven major stages.
Stage | Main Activity | Purpose |
1. Project Assessment | Review requirements, drawings and scan data | Define modeling scope |
2. Point Cloud Registration | Align individual scans | Create a coordinated dataset |
3. Data Cleaning | Remove noise and unnecessary information | Improve modeling efficiency |
4. Point Cloud Preparation | Organize and segment data | Make modeling easier |
5. BIM Modeling | Create architectural, structural or MEP elements | Build the BIM model |
6. Quality Control | Compare model against point cloud | Verify accuracy |
7. Final Delivery | Export and organize required files | Provide usable BIM deliverables |
Let’s look at each step in more detail.
1. Define the BIM Requirements
Before modeling begins, establish what the final BIM model needs to contain.
This is one of the most important steps because a model created for architectural renovation does not necessarily require the same level of detail as a model intended for fabrication or facility management.
The project team should define:
- Required disciplines
- Level of Development (LOD)
- Required model elements
- Accuracy/tolerance requirements
- Coordinate system
- Required software and file format
- Intended use of the model
- Required drawings or schedules
For example, an architect may primarily need walls, floors, ceilings, doors, windows, and major structural elements, while an MEP retrofit project may require detailed pipes, ducts, equipment, and service routes.
The point cloud should therefore be captured and prepared according to the intended BIM use, rather than treating every project as the same. Autodesk University similarly emphasizes briefing and defining the intended end use before using point clouds for Revit modeling.
2. Register the Point Cloud
Large buildings are rarely captured from a single scanning position. Multiple scans are normally performed from different locations and then registered together into a coordinated point cloud.
Registration aligns these individual scans into a common coordinate system so that walls, floors, structural elements, and MEP components appear in their correct spatial relationships.
If registration is inaccurate, the problem can carry through the entire BIM workflow.
This is why point cloud registration should be checked before modeling starts.
3. Clean and Prepare the Point Cloud
Raw scan data can contain unnecessary information.
For example, a scan may capture:
- Moving people
- Vehicles
- Temporary construction materials
- Reflections
- Equipment unrelated to the project
- Exterior surroundings
- Duplicate or redundant points
Cleaning removes or separates unnecessary data so the BIM modeler can focus on the actual building.
Modern reality-capture workflows can also organize point clouds into regions and classifications. Autodesk ReCap, for example, supports cleaning, cropping, registration, and organization of point-cloud data before it is used in BIM workflows.
Why this stage matters
A cleaner point cloud does not automatically create a better BIM model, but it makes interpretation easier and reduces the risk of modeling irrelevant geometry.
4. Import the Point Cloud into BIM Software
Once prepared, the point cloud can be linked into BIM software such as Autodesk Revit.
Revit supports RCP and RCS point-cloud formats. Other formats may need to be converted or indexed before they can be linked into the Revit project.
The point cloud remains a reference dataset. The modeler uses it to identify the actual position and geometry of existing building elements.
This distinction is important:
Point cloud = measured reality
BIM model = interpreted and structured building information
The point cloud itself does not automatically become walls, doors, pipes, or structural elements.
5. Model the Building Elements
This is where the actual point cloud to BIM conversion takes place.
The BIM modeler studies the point cloud through plans, sections, elevations, and 3D views and creates appropriate BIM elements.
For an architectural model, this might include:
- Exterior and interior walls
- Floors
- Roofs
- Doors
- Windows
- Ceilings
- Stairs
- Rooms
For structural modeling, the workflow may include:
- Columns
- Beams
- Slabs
- Foundations
- Structural walls
- Bracing
For MEP projects, modelers may reconstruct:
- HVAC ducts
- Pipes
- Cable trays
- Equipment
- Plumbing systems
- Electrical components
Revit provides tools for positioning and modeling elements against point-cloud data, including using section views and snapping to planes.
An Important Point About Automation
There are increasingly automated and AI-assisted tools available for point-cloud processing and element extraction. However, professional BIM conversion still requires human interpretation and quality control.
Existing buildings are rarely perfectly straight. Walls can be slightly curved, floors can slope, and older structures can contain irregular geometry.
A useful BIM model therefore requires decisions about what should be modeled, how it should be represented, and what level of accuracy is appropriate for the project’s purpose.
6. Perform BIM Quality Control
After modeling, the BIM model should be checked against the original point cloud.
This is one of the most important steps for producing a reliable as-built model.
Typical checks include:
- Wall alignment
- Floor elevations
- Ceiling heights
- Door and window positions
- Structural element locations
- MEP routing
- Model coordinates
- Missing elements
- Incorrect element sizes
- Unnecessary geometry
- Model consistency
A practical approach is to review the model in sections and 3D views while keeping the point cloud visible as a reference.
Autodesk’s Scan-to-BIM quality-control guidance specifically highlights the importance of visualization and checking the Revit model against the point-cloud source.
7. Deliver the Final BIM Model
After QA/QC, the final model can be prepared according to the client’s requirements.
Typical deliverables may include:
- Revit (.RVT) model
- Point cloud files
- IFC
- DWG drawings
- 2D plans and elevations
- Sections
- Schedules
- As-built documentation
The exact deliverables depend on the project scope and how the model will be used.
For example, a renovation architect may require an existing-condition Revit model and 2D drawings, while a contractor may need a coordinated model for construction planning.
Real-World Example: Converting a Scanned Existing Building into BIM
Consider an existing commercial building undergoing renovation.
The original CAD drawings are several years old, and some areas of the building have already been modified. The project team therefore cannot rely completely on the old drawings.
A laser scan is performed to capture the current condition.
The resulting point cloud shows the actual locations of walls, columns, ceilings, doors, mechanical equipment, and other elements.
During modeling, the BIM team discovers that one partition wall is approximately 100 mm away from its location in the old CAD drawing.
Instead of modeling according to the outdated drawing, the BIM modeler uses the registered point cloud as the primary reference for the existing condition.
The final BIM model therefore represents what is actually on site.
This is where point cloud to BIM becomes particularly valuable: the model is based on measured existing conditions rather than assumptions or outdated documentation.
For renovation and retrofit projects, this can give architects, engineers, and contractors a much more reliable starting point. Autodesk also identifies renovation, adaptive reuse, remodeling, and facility-management applications as important uses of Scan to BIM workflows.
Common Challenges in Point Cloud to BIM
Challenge | Potential Impact | Recommended Approach |
Incomplete scan coverage | Missing building elements | Check scan coverage before modeling |
Poor registration | Incorrect geometry | Verify alignment and coordinates |
Excessive scan noise | Slower modeling | Clean and organize the cloud |
Outdated drawings | Conflicting information | Use the verified scan as a key reference |
Undefined LOD | Wrong level of detail | Establish requirements before modeling |
Complex MEP systems | Difficult interpretation | Model discipline-by-discipline |
Irregular existing geometry | Modeling inaccuracies | Establish appropriate tolerances |
Insufficient QA/QC | Errors in final model | Compare BIM against point cloud |
Read more: Common Challenges in Point Cloud to BIM Conversion & Solutions
Point Cloud to BIM vs. Traditional As-Built Modeling
Traditional existing-condition modeling often depends heavily on old drawings and manual site measurements.
Point cloud-based modeling provides a dense digital representation of the existing environment that can be used as a reference during BIM authoring.
Factor | Point Cloud to BIM | Traditional Method |
Existing-condition reference | 3D scan data | Drawings/manual measurements |
Spatial information | High-density 3D data | Limited measurement points |
Irregular geometry | Easier to identify | Can be missed |
Verification | Compare model with scan | More dependent on field checks |
Renovation application | Highly useful | Can require more manual verification |
BIM integration | Direct reference workflow | Often requires additional drafting |
This does not mean scanning eliminates the need for site verification. The quality of the final model still depends on scan coverage, registration accuracy, modeling decisions, and QA/QC.
Final Thoughts
Converting point cloud data to BIM is a structured process rather than a simple file conversion. It starts with understanding the project’s requirements, continues through registration, cleaning, preparation, and BIM modeling, and finishes with detailed quality control.
The biggest advantage is that the BIM model can be developed from measured existing conditions, making it particularly useful for renovation, retrofit, restoration, coordination, and as-built documentation.
For AEC companies working with complex existing buildings, a well-executed point cloud to BIM workflow can provide a reliable digital foundation for the next stage of design and construction.
If you are looking for a professional workflow for converting laser scans and point cloud data into accurate BIM models, BIM Craft Hub provides Point Cloud to BIM and Scan to BIM solutions for architectural, structural, and MEP requirements. The scope can be tailored to the required LOD, project complexity, and intended use of the model.
Also read: What Is Scan to BIM and How Does It Work? A Complete Guide